My, how colorful you are!
Recently I was cutting some fabric leftovers and discovered I was winding up with a lot of 4.5″ and 2.5″ squares. a few months ago, I finished a quilt with Sawtooth Star blocks made with fabrics from each of the projects I’ve made over the past couple of years.
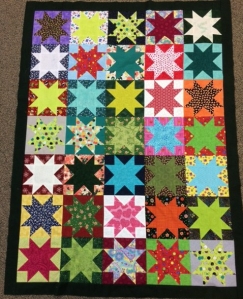
“My Colorful Life” 2016 by Anne Wiens
After I finish a project, I cut up any leftover strips of fabric less than a quarter-yard into Thrifty Quilter pieces for use later in scrap quilts. I decided to go ahead and make up an 8″ Sawtooth Star or two, and set them aside, adding to the stack until I had enough for a quilt. All the rest of the pieces went into my TQ bins. I was surprised at how quickly I collected the 35 blocks I needed for this 44″ x 60″ quilt!
I like this little quilt. It’s really a material diary of my projects for 2015 and 2016!
I decided to do another star quilt “diary” for this year’s projects, which will include class samples, demo samples, a challenge project, and charity quilts.
Looking at my growing collection of 2.5″ squares and 4.5″ squares, I decided on a variation of the classic “Ohio Star” block. I’m thinking this quilt will become a class for the Tucker Trimmer® rotary cutting tool, because I’ll be making a lot of half-square triangles (HSTs) and quarter-square triangles (QSTs).
For each block you will need: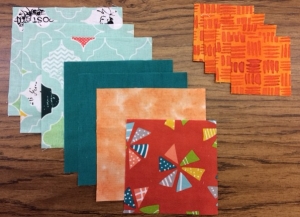
Two 4.5″ sq for background (White-not shown)
Two 4.5″ sq for star points (Dk Teal)
Three 4.5″ sq for star background (Lt Teal)
One 4.5″ sq for accent diamond (Lt Orange)
One 3.5″ sq for star center (Red)
Four 2.5″ sq for optional corner accent (Dk Orange)
Let’s begin construction by making the HST. For this, you need the two 4.5″ background (white) squares, and two of the 4.5″ star background (light teal) squares. Cut each square diagonally and sew into two HSTs.
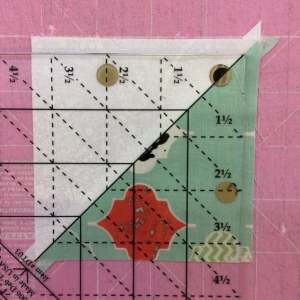
Step 1. Lay the Tucker Trimmer® on the HST, aligning the diagonal line with the seam line. Be sure the HST extends beyond the 3.5″ vertical and horizontal dashed lines on the tool.

Step 2. Trim the right and top edges.
Step 3. Rotate the HST, line the diagonal line up on the seam again. This time the cut edges snug right up to the 3.5″ vertical and horizontal dashed lines. Trim the right and top edges.
You now have four perfect 3.5″ HSTs. To be honest, you can do this with any small ruler that has a diagonal line in the corner.
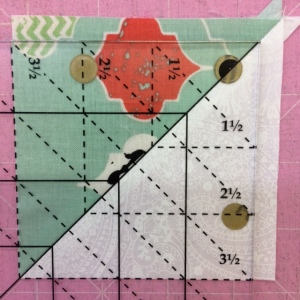
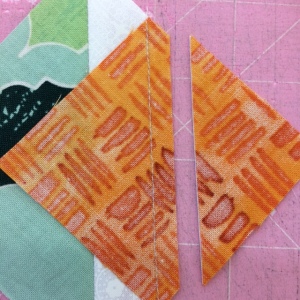
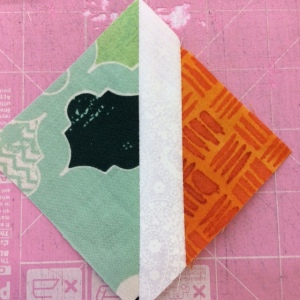
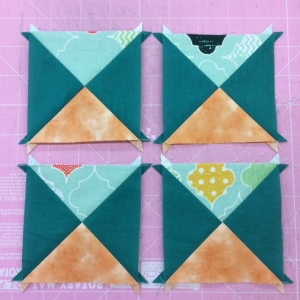 The Tucker Trimmer® earns its keep when we make QSTs, and we’ll do that now. Cut the remaining 4.5″ star background (light teal) square, the 4.5″ accent diamond (light orange) square, and two star point (dark teal) squares diagonally twice, and sew into four QSTs as shown.
When you look at the tucker trimmer, you’ll notice that in addition to the solid diagonal line from corner to corner, there are dashed diagonal lines running in the opposite direction.
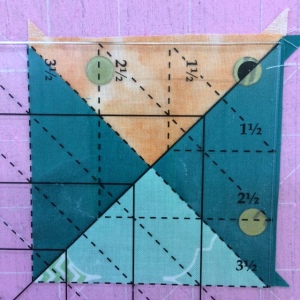
When making QSTs, you line the solid diagonal line with one diagonal seam, and the appropriate (3.5″ in our case) dashed diagonal line with the other seam. Trim two sides, rotate and trim the other two sides, as you did before.
Ohio Star – Variation 1
Lay out your center square, star point units and corner units as shown at right. This would be one variation of this block, and you may decide this is the look you want.
I’m going to set my blocks side-by-side, which will leave large white diamonds in the corners where the blocks come together. If I were going to send this quilt to a certain longarm artist I know, I’d leave that as a canvas for her to show off her mad skills. Instead, I’m going to add accent triangles to those white corners.
We’ll use the stitch-and-flip method for these accent triangles.
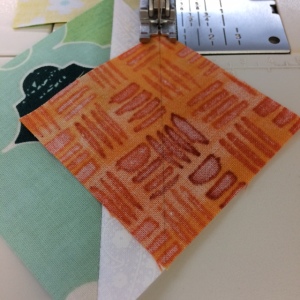
Step 1. Draw a diagonal line on the back of the 2.5″ accent (dark orange) squares. Align the square with the white corner on the HST, and sew on the drawn line.
Step 2. Trim 1/4″ outside the seam line.
Step 3. Press the corner into place.
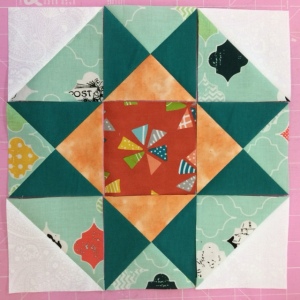
Now you can lay out the center square, corner units and star point units. Sew into rows and sew the rows together to complete your Ohio Star block.
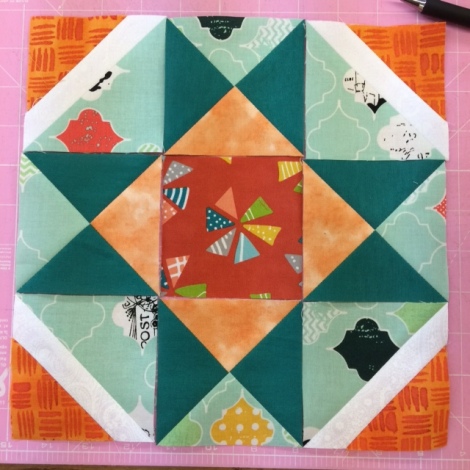
Ohio Star Variation 2 – 2016 by Anne Wiens
My plan is to make and collect these Ohio Star blocks until I have about twenty. I have a pretty interesting border treatment in mind that would be kind of traditional, but kind of modern. In my mind, it’s a great quilt. Time will tell if it translates to fabric!