 The March challenge for the 2018 Island Batik Ambassadors was to try a new Technique. Most of us are longtime quilters, instructors and/or designers, so for many of us, the hardest part of the challenge was to come up with a tool or technique we haven’t already tried! Fortunately, I had a couple of tools designed by Phillips Fiber Art that I had not had time to play with yet – The Gems 5 & 10 and Gem Star tools.
I started thinking about what sort of project I could make with the pieced and appliqued 5-pointed stars these tools make. I was surfing the internet in search of inspiration when I came across Diane Harris’s posts about a class she was taking on improvisational quilting. My muse tapped me on the shoulder and reminded me that the President’s Challenge theme I had chosen for my quilt guild this year is Wing It. “We can answer two challenges with one project,” says he.
“Improvisation. Make it up as you go,” I replied. “How hard can it be?” That was in early March. It’s now mid-June and I have just put the binding on. So there’s your answer. Here’s the rest of the story:
 We began with the fabric pull. I started with the collection of basics supplied by Island Batik. I chose a dark green for my big pieced star. I also decided that I had to use this yellow and magenta blend because…well, to be honest, since I had little confidence this project was going to turn out, I wouldn’t be too upset if, in the end, I felt like I had wasted it. Then I pulled out my bag of Island Batik
 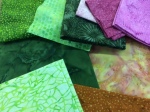 scraps and came up with more greens and pinks, and decided to add a copper-brown print from the basics.
In the end, I didn’t use the three lightest greens or the light pink, but at this point I still didn’t know what I was making. Better to have too many colors than not enough.
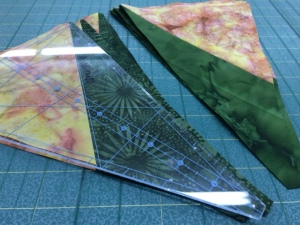 First came the pieced base. I made one large dark green star with the Gem 10 tool. The instructions that come with the tool are well-illustrated. In a nutshell, you sew stripsets, then use the tool as a template to cut wedges. There are five wedges with the darker green, and five mirror-image wedges with the slightly lighter green. Two wedges make one star point wedge.
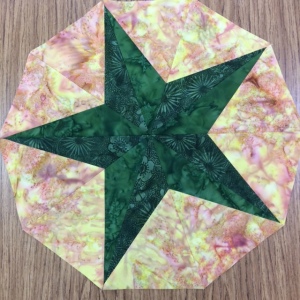
So, we start with a pieced 5-point star.
I have to say, the tool is terrific and easy to use. It makes a very large star, but there is also a Gem 10 Junior tool available if you want a smaller project. But I digress.
As it happens, the piece is a decagon shape. It works great for the several patterns Phillips Fiber Art has designed for the Gem 5 & 10 tools. However, my Muse and I had decided we wanted a square wallhanging.
 At this point, Muse left the studio. I hate it when he does that.
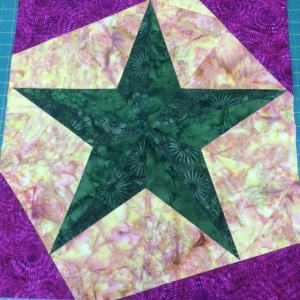
After several hours of thinking, slicing, patching, piecing and trimming up, I had a square-ish base piece. I couldn’t say I was happy with it, and frankly, I was feeling more than a little stressed out because I didn’t even know which side was top, bottom, left or right. I had no clue where I was going with this project. Finally, I convinced myself that if I didn’t love it, at least I didn’t hate it, and it was time to move on.
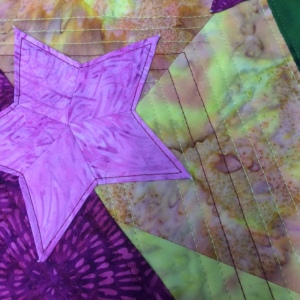
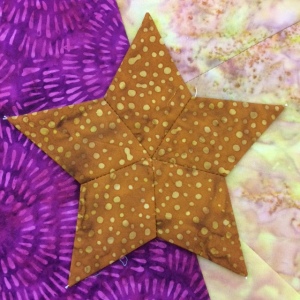 Making the applique stars with the Gem Star tool was the most enjoyable part of this project. There’s a clever little trick for getting those points so pointy, and the only difficult part of the whole process is getting the center to match up. Most were oh-so-close, but this gold one is dead-on perfect.
When these stars are finished, the edges of the points are turned under already, so it’s a simply matter to applique them down, whether you you want to hand-sew or machine-sew them.
I didn’t have any idea how many stars I needed or where they were going to be placed, so I just started making them in several sizes. In the end, I made more than I needed. The extras may become Christmas ornaments.
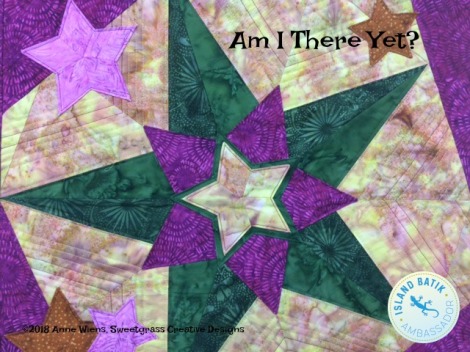
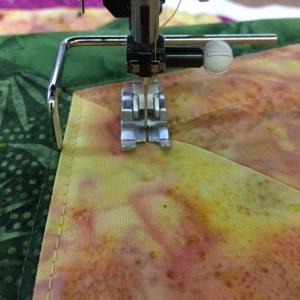 Quilting is very simple on this piece. I stitched 1/4″ inside and outside the perimeter of the large pieced star, then echo-quilted straight lines in the gold background, and straight lines across the magenta corners.
Using my quilting guide bar, and my seams as a pivot point, it was easy to make straight, evenly-spaced quilting lines. I sewed a 1″ spaced line, then two 1/4″ lines, then 1″, two 1/4″, repeating until the space was filled.
Next decision: Where to put the applique stars. If I hadn’t been so far beyond deadline at this point, I would have enjoyed playing with the possibilities. Here are a few of the options I liked:


The more I played with the stars, the more I felt something just wasn’t right with the base piece yet. It was the gold areas. After stewing over it for a few days, Muse resurfaced and suggested I add a few lines of quilting that might actually be visible in the gold areas.
It’s amazing how just a little detail can make such a big difference.
Those two lines of magenta quilting were just what this piece needed to pull it all together.
Note to Muse: It would have been easier if you had suggested it before I appliqued the stars down. Just sayin’.
So, is it finished now? I don’t know. Hence, the title – Am I There Yet?
After all, if you don’t know where you’re going, how do you know when you’ve arrived?
The fabrics used in this piece were supplied by Island Batik. The threads are from Aurifil, and the batting from Hobbs.
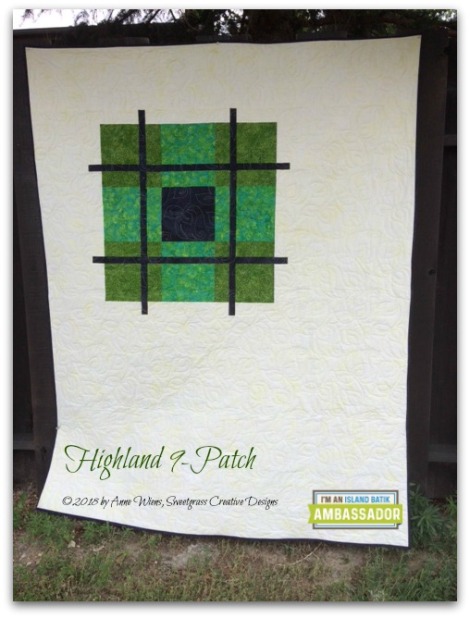
 This is proving to be a bigger challenge for some of us than for others. Personally, I consider my project, The Highland 9-Patch, a “splendid failure.”
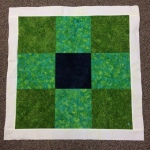 I did begin with a 9-Patch. Mine has an 8″ square of navy blue in the center, 9″ squares of a bright green in the corners, and the side “squares” are actually 8″ x 9″.
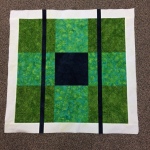 Next, I sliced the block vertically 2.5″ outside the center seam on both sides of the center squares…
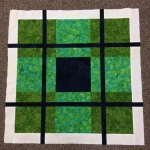 Then I did the same thing, slicing and splicing in 1″ horizontal strips.