10″ TQ Blocks

The Blooming 9-Patch

IMG_3690
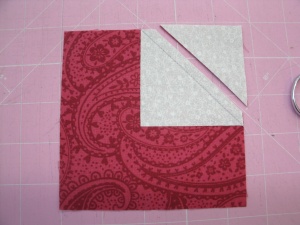
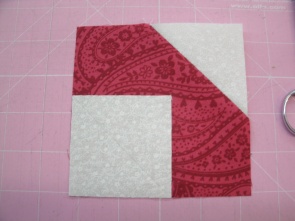
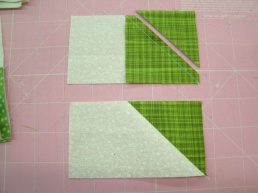
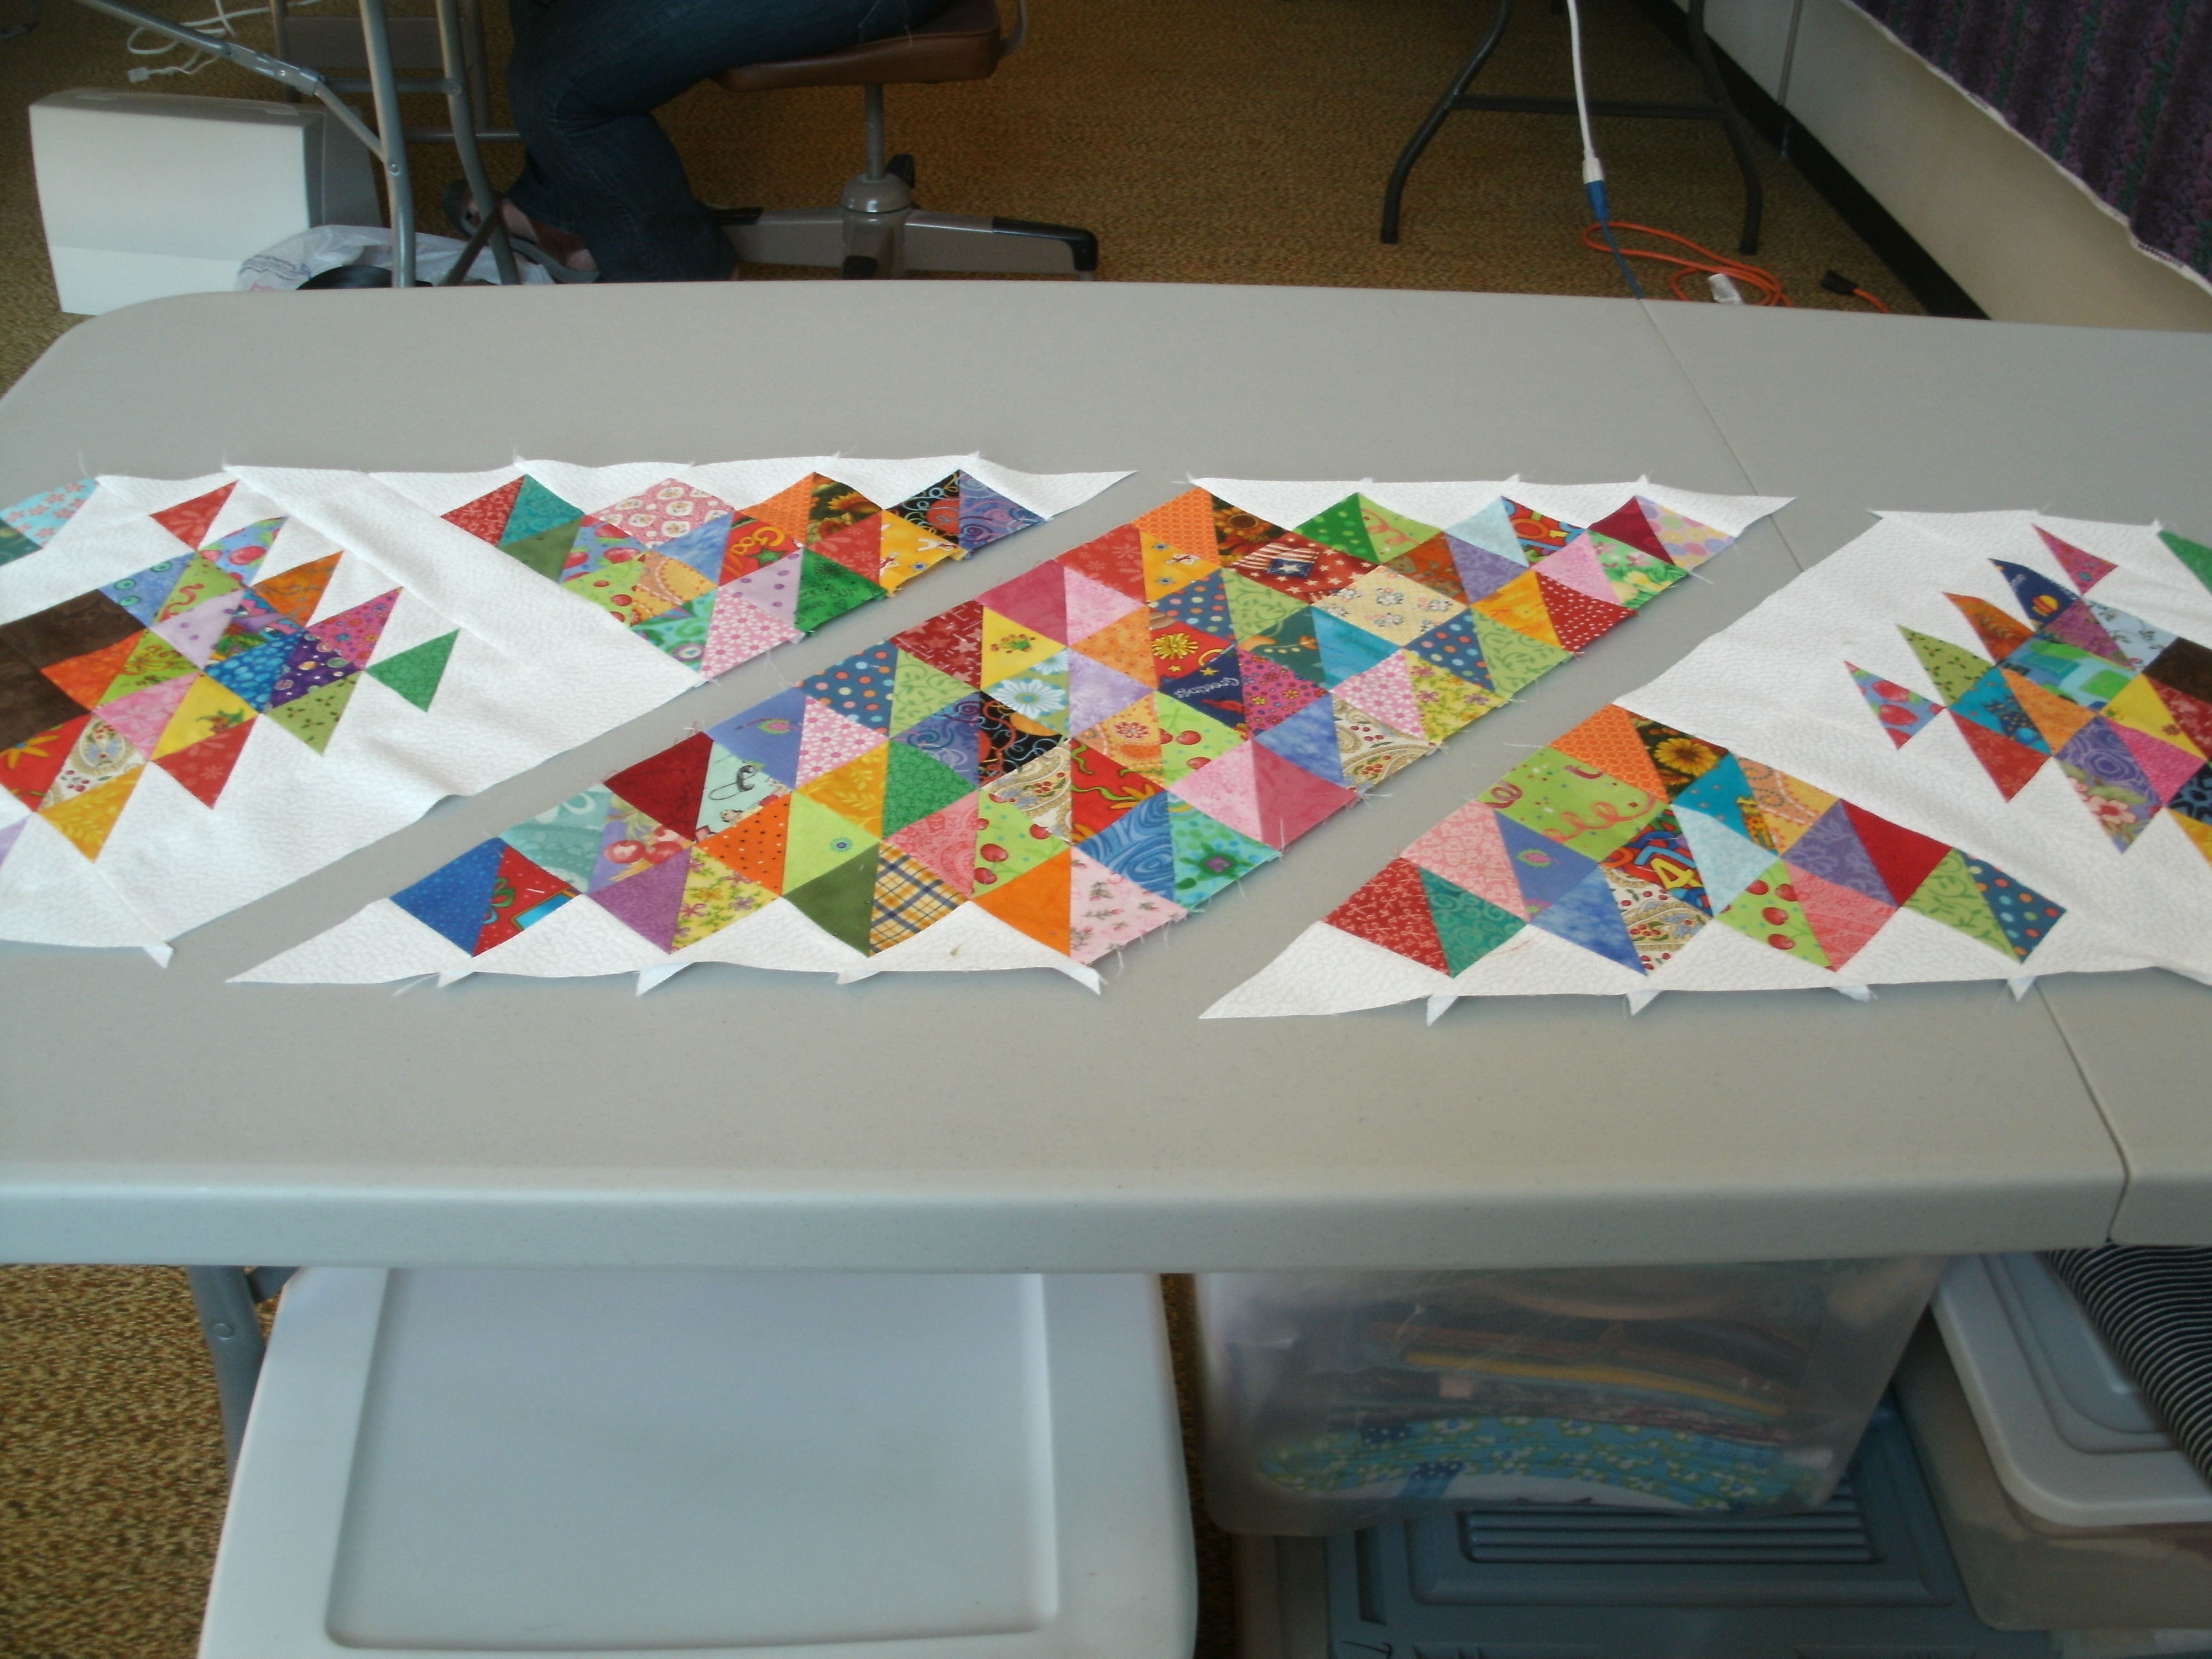
When working with the pre-cut scraps in my Thrifty Quilter system, I make a lot (a LOT) of Stitch-and-Flip corners. After thousands of of them, I was over drawing that diagonal line. One day I discovered I could layer the pieces, put my ruler down with the 1/4″ line on the diagonal points, cut that triangle away, then sew the seam and press the corner open.

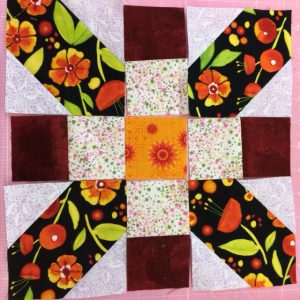
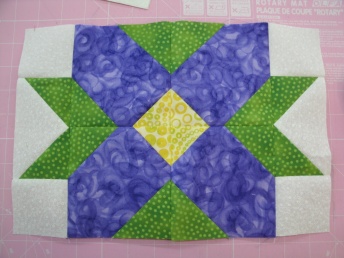
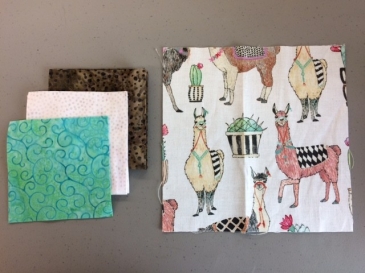
Then Doug Leko of Antler Quilt Design came out with a new tool he calls the Mini Simple Folded Corners. First, it’s a new gadget, and I am a gadget geek. Second, it resembles a tool idea that was simmering in the back of my mind. So, I bought one, and decided this 10″ block I call the Blooming 9-Patch would be a perfect block to demonstrate it.

IMG_3684
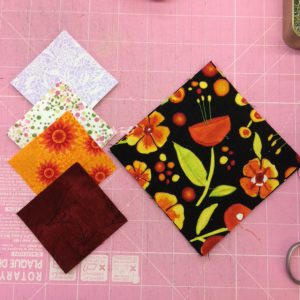
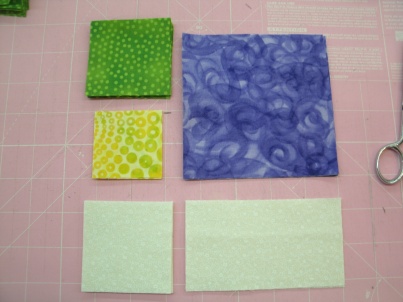
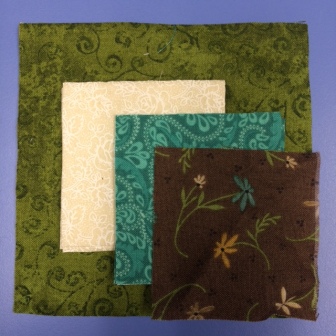
For each Blooming 9-Patch, you will need:

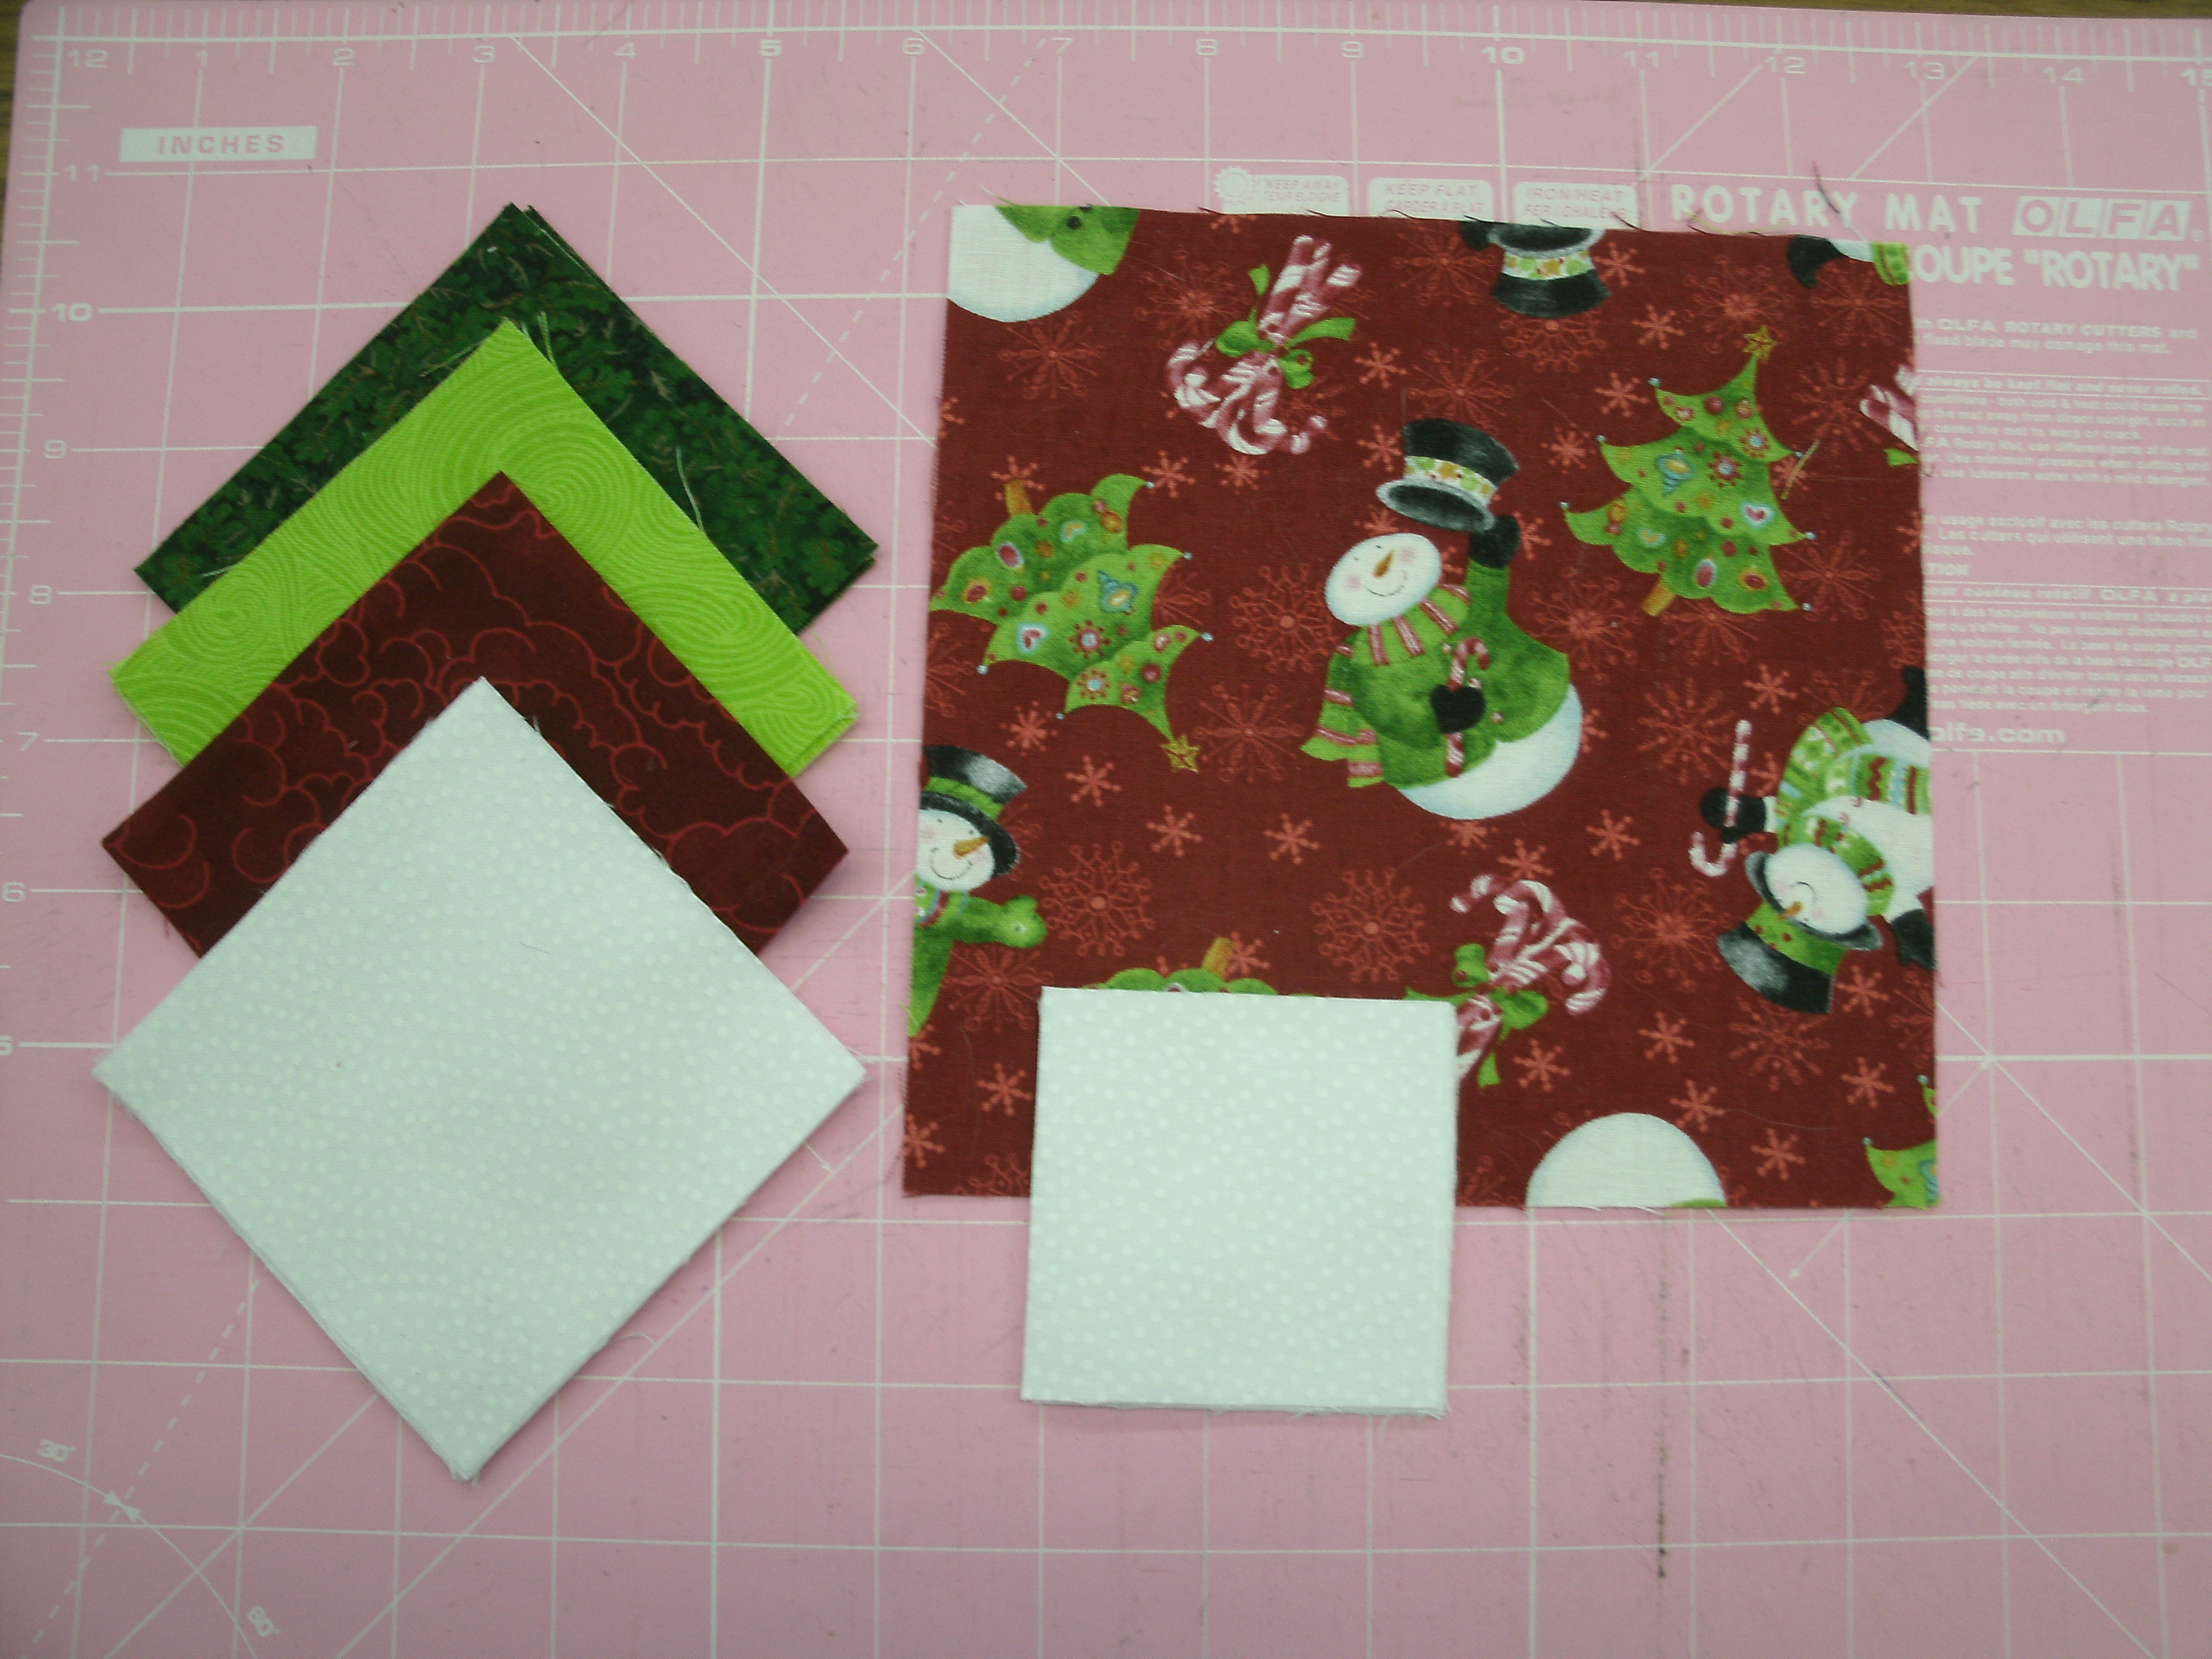
Four 4.5″ green squares

Eight 2.5″ beige squares

Four 2.5″ teal squares

One 2.5″ brown square


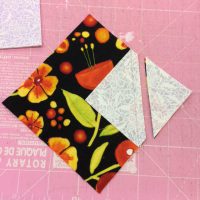
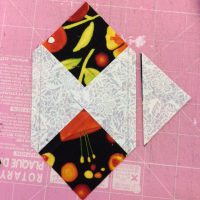
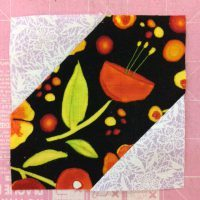
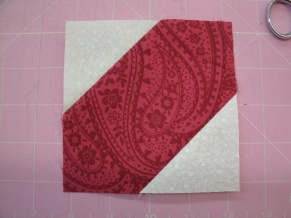
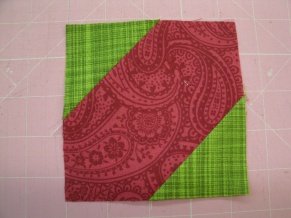
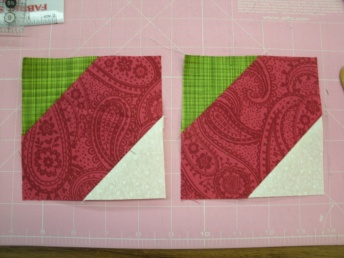
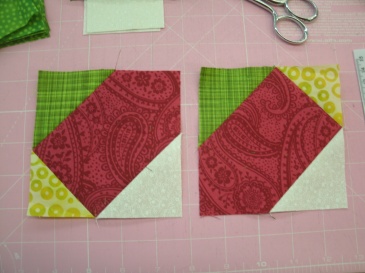
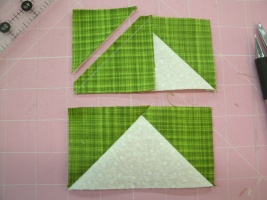
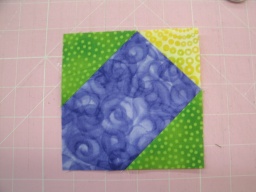
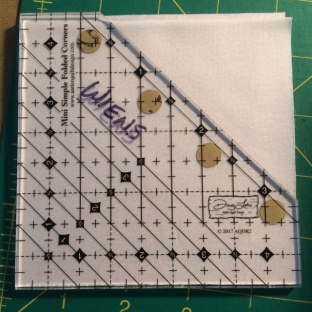
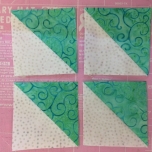
Step 1- Use the Stitch and Flip method to put a 2.5″ beige triangle corner on each of the 4.5″ green squares. I laid the beige square on the corner of the green square, then laid the tool down so that the 2.5″ lines lined up with the left and bottom edges of the beige square, and the printed diagonal line (which indicates my seam line) ran diagonally from the upper left to lower right corners. I cut away that triangle, sewed the seam and pressed the corner open. Again, this is not the way the tool was designed to work, but it worked for this block.

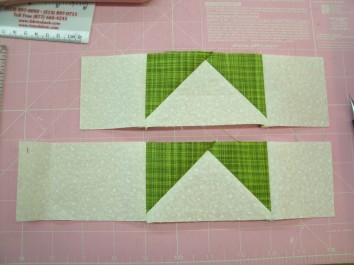
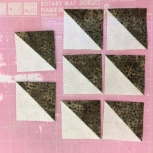
Step 2 –  Sew the 2.5″ teal squares to the remaining 2.5″ beige squares.

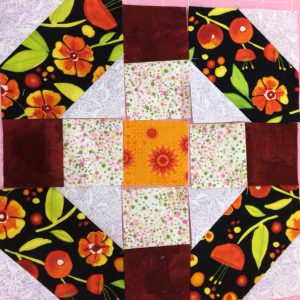
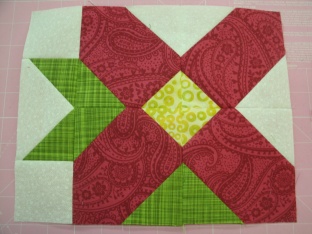
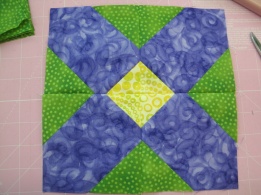
Step 3 – Sew two rows with a teal/beige pair sandwiched between two green/white squares. Sew the other teal/white pairs into a strip with the brown square between the two teal squares.


Cropped block

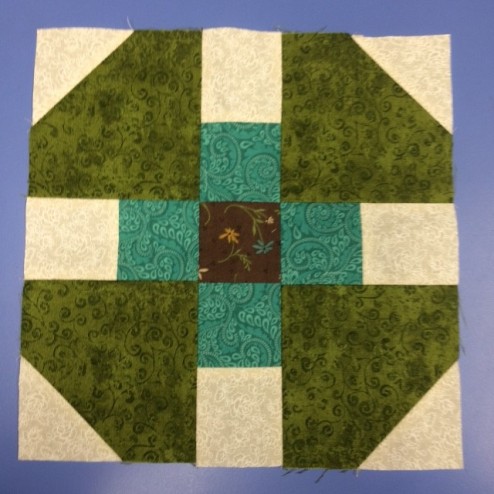
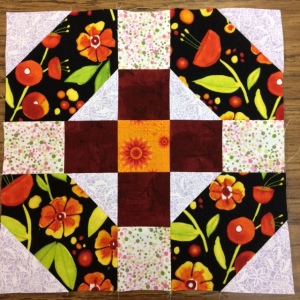
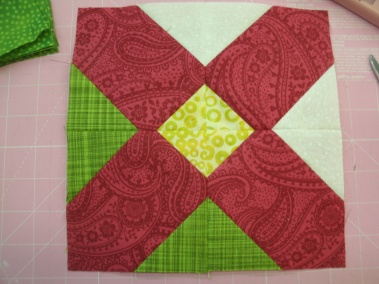
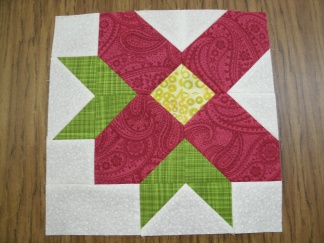
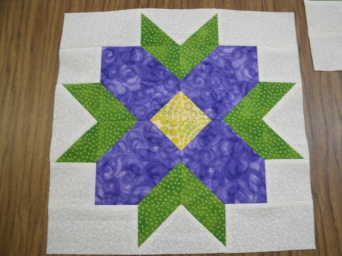
Step 4 – Sew the row of squares between the other two rows to complete your Blooming 9-Patch block!

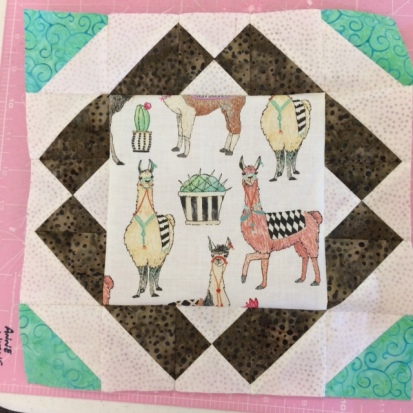
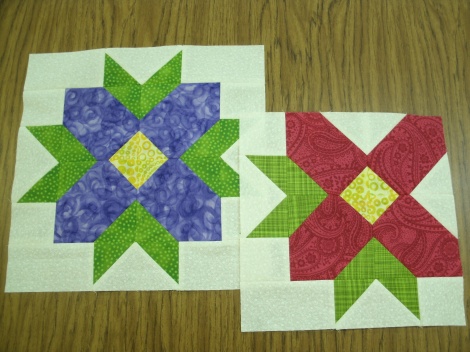
The block, unfinished, measures 10.5″ x 10.5″. I have a plan for it in my sketch book, which should make use of a layer cake I have left over from my stint as an Island Batik Ambassador.  It’s on my To-Do list, but a ways down the list right now.

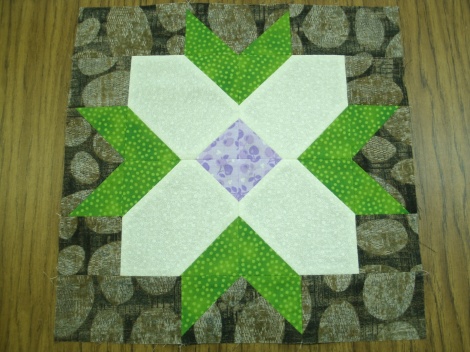
I have a classic block coming up next here on Seams Like a Plan.


Categories: 10" Squares, 10" TQ Blocks, The Thrifty Quilter System, Thrifty Quilter Blocks & Patterns, Tools, Uncategorized | 1 Comment

Rama-Llama-Boo-Boo :0/

My go-to high school graduation gift is a pillowcase. It’s easy to make, and you can customize it for the recipient. (I like to point out that it also makes a good laundry bag.) When a co-worker’s daughter graduated last spring, she had already decided she was going to decorate her dorm room in llamas and turquoise. I was tickled when I found the perfect llama print.

I had enough left from the pillowcase to add a few 6.5″ squares to my Thrifty Quilter bin. At a recent retreat weekend, I played with an idea for a 10″ quilt block. That explains the first part of this post’s title. The rest will be clear shortly.

IMG_3493
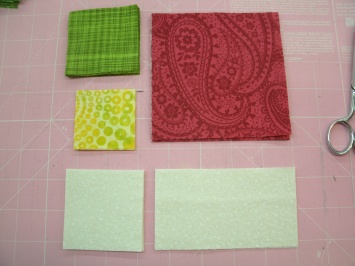
Here are the TQ pieces needed for this block:

One 6.5″ square Novelty Print

*Two 3.5″ turquoise squares

*Six 3.5″ brown squares

*Eight 3.5″ white squares


Step 1:

img_3532.jpg

Cut two 3.5″ brown squares and two 3.5″ white squares diagonally twice, and sew into four quarter-square triangles (QSTs). Trim each one to 2.5″ square.  Unaffiliated endorsement: If you don’t have one, get yourself a Tucker Trimmer®. If your local shop doesn’t carry them, you can order direct from Studio 180 Designs. 


Step 2:

IMG_3531 (1)IMG_3530
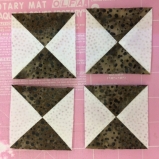
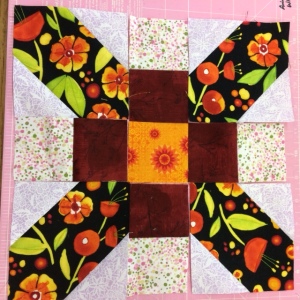
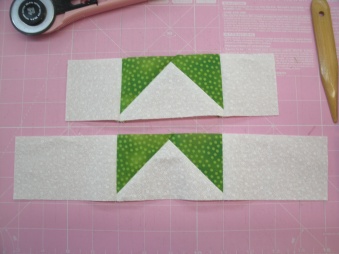
Cut the remaining brown squares, white squares and the turquoise squares in half diagonally. Sew into eight brown and white half-square triangles (HSTs) and four turquoise and white HSTs. Trim each to 2.5″.


Step 3:

IMG_3533
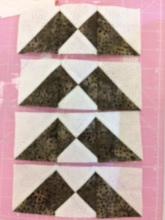
Sew a brown and white HST to the brown sides of each QST as shown.

Just so you know, this is where I made my boo-boo. We’ll see if you can figure out what I did.

Hint: I did steps 1 & 2 on one day, and step 3 a few weeks later.


Step 4:

Sew a strip to the left and right sides of the 6.5″ novelty square. Sew the turquoise and white squares to the ends of the other two brown and white strips, and sew these to the top and bottom of the center unit to complete your block.

IMG_3534

“Corral” – 2019

So now you see my mistake.  Actually, it’s an honest mistake that I made worse by not addressing it immediately.

Here’s what happened:

I was using a machine that has a little quirk. Even though I have a quarter-inch presser foot, I still have to move the needle three positions to the left to have a true quarter-inch seam. Of course, I turned the machine off at the end of the first day of the retreat, having finished Step 2. When I switched the machine on the next time, the machine went to its default settings, and I forgot to bump the needle over before beginning Step 3.  That was my first mistake.

When I sewed strip to the left side of the llama square, I noticed that it didn’t fit. I should have unsewn that seam, measured the strip and figured out why it was too long. (Because I didn’t move the needle, my seams when sewing the HSTs to the QSTs were too narrow.)  That was my second mistake.

Instead of addressing the problem, I told myself “it won’t be that noticeable”, and simply trimmed the end off flush with the larger square. That’s was my third mistake, and for this block, the fatal error.  I know better than that! For pity sake, I’ve been doing this for over 40 years. I have no excuse.

I will forgive my quilty friends if they snicker when I say, I am not a “point prude.” I know all quilters are human, and imperfect points happen to us all, but this one will haunt me for a while.

Live and learn.


Categories: 10" Squares, 10" TQ Blocks, Thrifty Quilter Blocks & Patterns, Tucket Trimmer (Studio 180 Designs), Uncategorized | 2 Comments

Born to Be (Not Quite) Wild

A few weeks ago, my friend Diane Harris (a.k.a. “The Stash Bandit“) posted a blog, then asked her Facebook followers, “Are you brave enough to combine fabrics with wild abandon?” This was the quilt she showed as an example:

“Wild Abandon” by Diane Harris – Photo used by permission

“Pffft” sez I, “I can do that!” Turns out it isn’t as easy to be random as you’d think it would be. Don’t get me wrong…I make scrap quilts all the time, and I have no problem combining fabrics within the quilt that just “don’t go together.” However, the fabrics almost always coordinate with in the individual blocks.

So, I can do “wild.” It’s the “abandon” I will have to work on.

While I was playing, I came up with a block to show you. It finishes 10″ square.

I’m calling it “Happy Scraps”

For each 10″ (finished) block you will need four 4.5″ squares. Mine match, but yours do not have to. You will need a total of seventeen 2.5″ squares. I have eight lavender, four deep red, four splattered, and one orange. If you want to throw caution to the wind, just make sure you have one medium value square, four dark squares, and the remaining twelve squares should be light.

IMG_1376

IMG_1377

IMG_1378

Use the stitch-n-flip method to put light triangles on two opposite corners of each of the 4.5″ squares. Set these squares aside.

Sew four light 2.5″ squares to four dark 2.5″ squares.

Before we sew these units together, let’s consider our options:

Option 1

Option 2

Option 3

Option 4

IMG_1385

“Happy Scraps” by Anne Wiens – 2017

In the end, I chose Option 2, though I’m pretty fond of Options 1 and 4.

This is why I am never bored, for every quilt I make, I come up with several more ideas. Fortunately, my scrap bin overfloweth!

Categories: 10" TQ Blocks, The Thrifty Quilter System, Thrifty Quilter Blocks & Patterns | 4 Comments

Little Spring Blossoms

Many years ago, while vacationing with my family at Cascade, Idaho, I took myself for a little walk along the lake shore, and discovered a sweet little white wildflower. It was so unassuming….just tiny white blossoms that grew low to the ground. In fact, if you didn’t stop and stoop down to look closely, you wouldn’t notice the little purple pinstripes at the base of each petal. I honestly don’t know why that little flower has stuck with me all these years, but it inspired this flower block:

GE DIGITAL CAMERA

“Little Wildflower” by Anne Wiens – 2016

I’m going to give you two options for this block. The first is a two-leaf version that finishes 10″ square, and the second is a 12″, four-leaf version like the photo above.

For the two-leaf flower you will need:

GE DIGITAL CAMERA

“Little Wildflower” by Anne Wiens – 2016

Four 4.5″ squares (pink) for blossom

Eight 2.5″ squares green for leaves

Four 2″ squares yellow for flower center

Seven 2.5″ squares (white) for background

Three 2.5″ x 4.5″ rectangles (white) for background

GE DIGITAL CAMERA

Step 1a

GE DIGITAL CAMERA

Step 1b


Step 1 – Use the stitch-and-flip method to put small triangle corners the 4.5″ blossom squares. To do this, lay a 2.5″ square on the corner of the larger square and draw a diagonal line as shown in photo 1a. Sew on the line and trim off the corner 1/4″ from the seam as in photo 1b above.

GE DIGITAL CAMERA

Step 1c

GE DIGITAL CAMERA

Step 1d


Press the corner open, and repeat on the opposite corner (photo 1c).

Make one “petal unit” with two white corners.

GE DIGITAL CAMERA

Step 1e

Make one petal unit with two green corners.

GE DIGITAL CAMERA

Step 1f

Make two petal units with one white corner and one green corner.

GE DIGITAL CAMERA

Step 1g

Use the same stitch-and-flip technique to put one yellow corner on each petal unit. Note that on the green and white petal units, the yellow corners need to be on opposite ends, as shown above.

GE DIGITAL CAMERA

Step 1h

Now you can sew the four petal units together as shown to make the blossom.

Set aside while we make the leaf units.

GE DIGITAL CAMERA

Step 2a

GE DIGITAL CAMERA

Step 2b


Step 2 – Use 2.5″ x 4.5″ background rectangles and 2.5″ green squares to make two flying geese units with the stitch-and-flip technique.

GE DIGITAL CAMERA

Step 2c

Sew 2.5″ background squares to both end of of one flying geese unit.

Sew a square to the right end of the other unit, and a 2.5″ x 4.5″ rectangle to the left end.

GE DIGITAL CAMERA

Step 2d

Sew the shorter leave unit to the left side of the blossom unit.

GE DIGITAL CAMERA

10″ Little Wildflower by Anne Wiens

Sew the longer leaf unit to the bottom of your blossom to complete the 10″ Little Wildflower block.

I also made a 12″ version, with four leaves.

GE DIGITAL CAMERA

12″ Little Wildflower pieces

Four 4.5″ squares (purple) for blossom

Sixteen 2.5″ squares green for leaves

Four 2″ squares yellow for flower center

Four 2.5″ squares (white) for background

Eight 2.5″ x 4.5″ rectangles (white) for background

GE DIGITAL CAMERA

12″ block Petal Units

GE DIGITAL CAMERA

12″ Block Blossom Unit

For the larger block, all of the petal units have two green corners and one yellow.

GE DIGITAL CAMERA

12″ block Leaf Units

For the 12″ block, make four green and white flying geese units. Sew background squares to the end of two geese, and background rectangles to the ends of the other two flying geese.

GE DIGITAL CAMERA

Sew the shorter leaf units to opposite sides of the blossom unit.

GE DIGITAL CAMERA

Sew the longer leaf units to the top and bottom to complete the 12″ Little Wildflowers block.

GE DIGITAL CAMERA

Little Wildflowers – by Anne Wiens (2016)

Categories: 10" TQ Blocks, 12" TQ Blocks, Thrifty Quilter Blocks & Patterns | 8 Comments

Season’s Greetings

Christmas is coming on like a bobsled, and I still have gifts to finish, but I stopped today to whip up a little something for you.

Surprise…it’s a quilt block! :0)  It’s a 10″ (finished) block, and I called it “A Christmas Wreath”.

Here’s the recipe:

GE DIGITAL CAMERAFor each block you will need:

One 6-1/2″ square novelty print

Three 3.5″ red squares

Three 3.5″ light green squares

Four 3.5″ dark green squares

Six 3.5″ white squares

Four 2.5″ white squares

I used a Tucker Trimmer® to make the half-square triangles (HSTs) and quarter-square triangles (QSTs). If you’re not familiar with this tool, CLICK HERE for a previous post that goes into more detail on its use.

Step 1a

Step 1a

The first step is to put white corners on the novelty print square.

Draw a diagonal line on the back of each of your 2.5″ white squares. Lay a square on a corner of the 6.5″ novelty print square and sew on the line, then trim 1/4″ outside the line. Repeat with all four corners.

Step 1b

Step 1b

Press the corners open. Set this center section aside.

Step 2a

Step 2a

Step 2b

Step 2b

Step 2 is to make four red and white HSTs. Cut two of the red 3.5″ squares and two 3.5″ white squares in half diagonally, and sew the red and white halves together. I press my seams open, but you can press to the dark side if you prefer. Use the Tucker Trimmer® to trim the HSTs to 2.5″ as illustrated. above.

Step 3a

Step 3a

For Step 3, we need to make QSTs. Cut all of the remaining 3.5″ squares diagonally twice.

Step 3b

Step 3c

Step 3b

Step 3b

Sew eight QSTs, each with two dark green triangles, one light green triangle and one white triangle, then use the Tucker Trimmer® to square them to 2.5″ as illustrated above.

You will also need four QSTs, each with two white triangles, one red triangle and one light green triangle. Square them to 2.5″ as well.

Step 4a

Step 4a

Sew the QSTs into four units as pictured above.

Step 4b

Step 4b

Sew two of the QST strips to the sides of the center unit.

Step 4c

Step 4c

To finish your block, sew the HSTs to the remaining QST strips as shown, and sew to the top and bottom of the center unit.

Of course, just because I called it a wreath and used red and green fabrics, that doesn’t mean you have to.

Merry Christmas!

Categories: 10" TQ Blocks, HST's, Scrap Quilts, The Thrifty Quilter System, TQ Patterns, Tucket Trimmer (Studio 180 Designs) | Tags: , , , , | 2 Comments

An Autumn Scrap Basket…by Chris

You know the best part about being a designer? It’s seeing what other people do with my designs.

I found this photo in my inbox this morning. It’s from Chris Browning, a friend of mine who moved to upstate New York not long ago:

Chris' Scrap Basket 2013She wrote: “I needed a break the other day so I went in search of your blog and fell in love with your bountiful Table pattern. I love fall colors so attached is what I made! It was a lot of work but I have plans for a red, white and blue one for the 4th and where you have the white around the baskets I think I will applique some stars! “

I love the autumn colors, Chris, and can’t wait to see the red, white and blue version!

Categories: 10" TQ Blocks, HST's, Reader Photos, Scrap Quilts, Tablerunners, Thrifty Quilter Blocks & Patterns | 1 Comment

A Bountiful Table

It’s harvest time in Montana’s Golden Triangle, and from the accounts I’ve heard, it’s a bountiful harvest. Nature’s “white combine” -hail- did claim a share, but as I drove home the 60 miles from Inverness to Shelby (after a day of quilting with friends), I saw dozens of combines hard at work, and a parade of trucks hauling wheat to the big elevator in Chester. A lot of hard work is paying off.

My overflowing scrap basket is a testament to hard work, too, and as I was picking out fabric bits and sewing this tablerunner project, I was reminded of dozens of projects these scraps came from…a quilt for a new family menber and Project Linus and for a service member returning from overseas, samples for classes, patterns and demonstrations at my local quilt shops and guilds. So many memories, that will now be right there on the table, reminding me to give thanks for a full plate, and a full life.

In the previous blog, I showed you how to make an Overflowing Scrap Basket block. To complete this tablerunner you will need:

70 2.5″ Half Square Triangles (HSTs) that have two prints.

4 2.5″ HSTs that are half white and half print

7 4.25″ white squares – Cut each diagonally twice for 28 triangles

2  2.5″ x 8.5″ white strips

2 2.5″ x 10.5″ white strips

4 2.25″ x WOF strips for binding

(Total 5/8 yard white)

We will be building this tablerunner by making two end units and a middle unit.

Let’s start with the two end units:

This tablerunner will have two Overflowing Scrap Basket blocks, one at each end. To make the trim pieces, sew two strips. The first is three print/print HSTs, a print/white HSt and a white triangle. Sew the is strip to the lower right side of the basket block as illustrated. The second strip is four print/print HSTs, one print/white HST and a white triangle. Sew this strip to the lower left side of the basket block. Do this for both blocks.

This tablerunner will have two Overflowing Scrap Basket blocks, one at each end. To make the trim pieces, sew two strips. The first is three print/print HSTs, a print/white HST and a white triangle. Sew the is strip to the lower right side of the basket block as illustrated. The second strip is four print/print HSTs, one print/white HST and a white triangle. Sew this strip to the lower left side of the basket block. Do this for both blocks.

Next we need to piece a triangle unit. You will make two of these units.

Build this triangle by sewing two white triangles to adjoining sides of one HST. Then sew two HST's together and add a white triangle. The third row has three HSTs and a white triangle, and the fourth row is the 2.5" x 8.5" white strip with a white triangle at one end. Sew these four rows together to make the large triangle unit shown. Make two of these triangle units, and sew them to the LEFT side of your blocks.

Build this triangle by sewing two white triangles to adjoining sides of one HST. Then sew two HST’s together and add a white triangle. The third row has three HSTs and a white triangle, and the fourth row is the 2.5″ x 8.5″ white strip with a white triangle at one end. Sew these four rows together to make the large triangle unit shown. Make two of these triangle units, and sew them to the LEFT side of your blocks.

Next, we add a strip to the right side of each block:

Sew four HSTs together and add a white triangle at one end. Sew the 2.5" x 10.5" white strip to the HST's and finish with another white triangle. Sew this strip to the RIGHT side of the basket block.

Sew four HSTs together and add a white triangle at one end. Sew the 2.5″ x 10.5″ white strip to the HST’s and finish with another white triangle. Sew this strip to the RIGHT side of the basket block.

The two end units are complete. Set them aside while we make the center unit.

Sew four strips with nine HST's in each strip. Add a white triangle to each end of all four strips. Sew the strips together as shown.

Sew four strips with nine HST’s in each strip. Add a white triangle to each end of all four strips. Sew the strips together as shown.

Just two seams to go now…

Lay out your center and end sections as shown and sew together to complete your tablerunner top.

Lay out your center and end sections as shown and sew together to complete your tablerunner top.

The piece should measure approximately 15″ x 54″.

If you looked closely at my finished top, you may notice that all of the HST’s are sewn do that their center seams run the same direction. You do not have to worry about that if you don’t want to…I did a fair amount of “frog stitching” (rippit) because it is easy to get those HST’s turned around.

You may also notice that I mixed in just a few full 2.5″ squares. I admit it…I got bored making HSTs! In fact, if you wanted to, you could do the whole thing (except the baskets) with 2.5″ squares.

"A Bountiful Table" by Anne Wiens, Sweetgrass Creative Designs  2013

“A Bountiful Table” by Anne Wiens, Sweetgrass Creative Designs 2013

I’d love to see a photo of your tablerunner.

You can email it to me at: anne@sweetgrassdesigns.com.

Categories: 10" TQ Blocks, HST's, Scrap Quilts, Tablerunners, Thrifty Quilter Blocks & Patterns, TQ Patterns | 1 Comment

Blog at WordPress.com.