September is Ovarian Cancer Awareness Month, and each September, Beth Helfter of EvaPaige Quilt Designs hosts a fund-raising mug-rug swap she calls “Two for Teal”.

In return for a donation to Ovarian Cancer research, Beth sends each participant a swatch of fabric. This year it was a hand-dyed teal provided by Cherrywood Fabrics. The challenge is to make a mug rug, which will be traded with another participant.
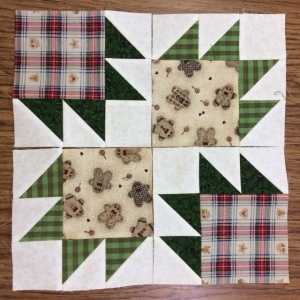
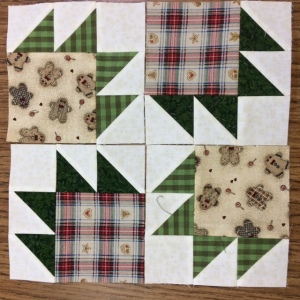
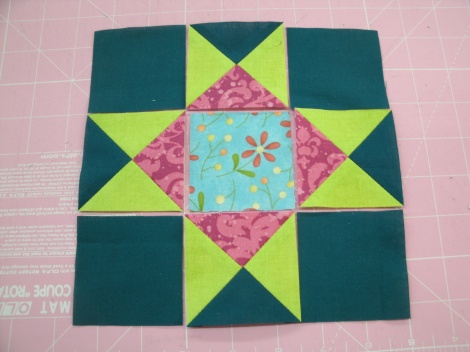
Here’s the rug I made:
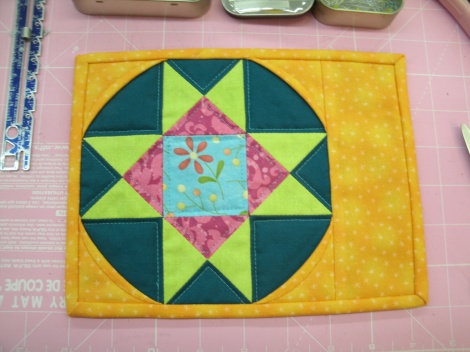
Mug Rug 1 – 2014 by Anne Wiens
Here’s how I did it:
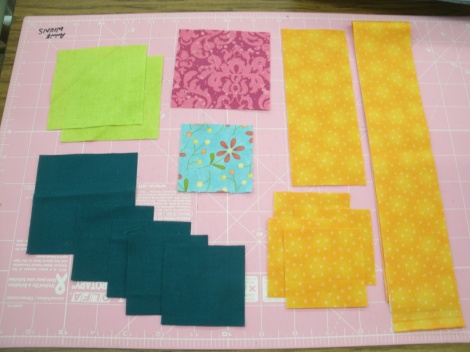
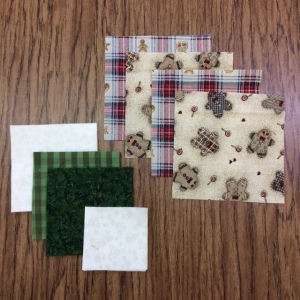
Materials
One 2.5″ square for the star center (light blue)
One 3.5″ square for the accent diamond (pink)
Two 3.5″ squares for star points (lime green)
One 3.5″ square and four 2.5″ squares for star background (teal)
Four 2.5″ squares and one 2.5″ x 6.5″ strip for border (orange)
One 2.25″ x 42″ strip for binding (orange)
Materials
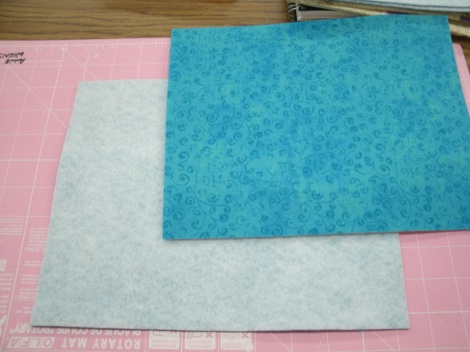
For the backing and batting, I had a couple of pieces of fabric backed with fusible fleece left over from another project. These are about 8″ x 10″. The mug rugs finished at 6.5″ x 8.5″.
Construction – 1a
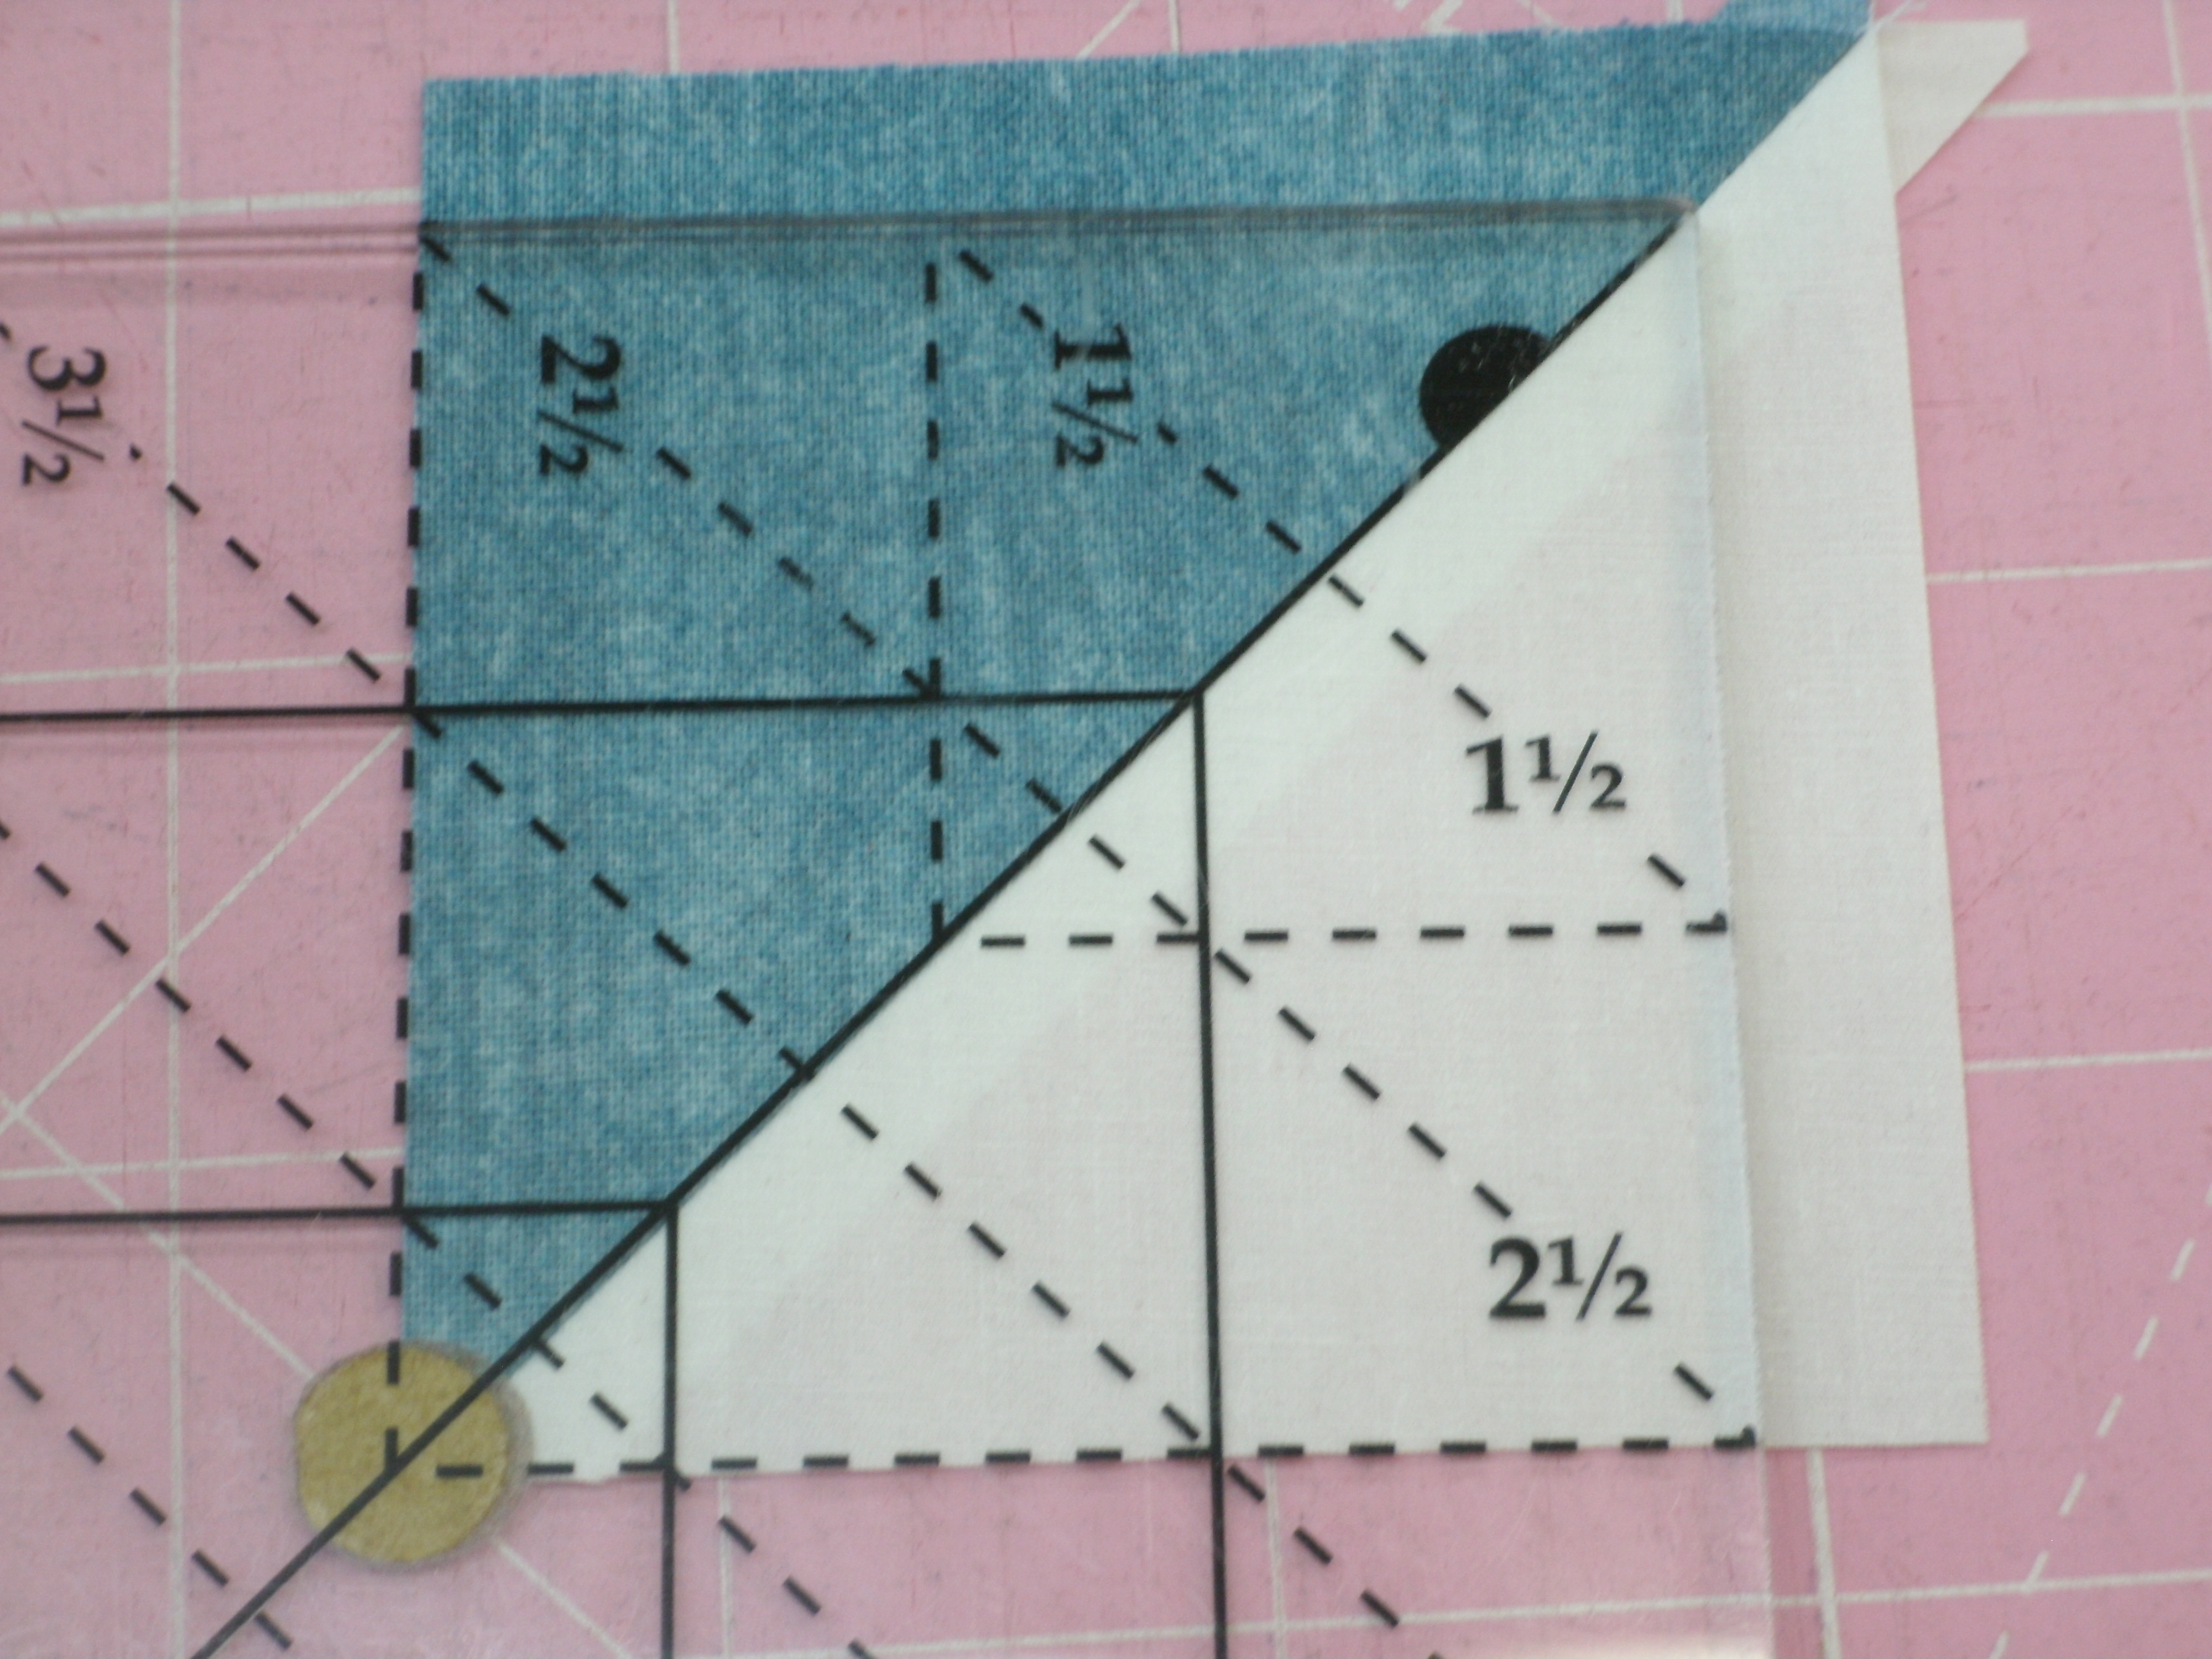
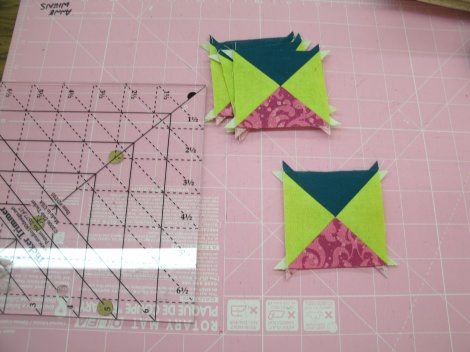
Step one is to make the four quarter-square triangles (QSTs) for the star-point units.
I like to use my Tucker Trimmer(tm) for this step. Since our finished QST will be 2″ square, we add 1.5″ and begin with 3.5″ squares. Use your favorite method to make the QSTs as shown above. These QSTs are larger than they need to be, so we will trim them down.
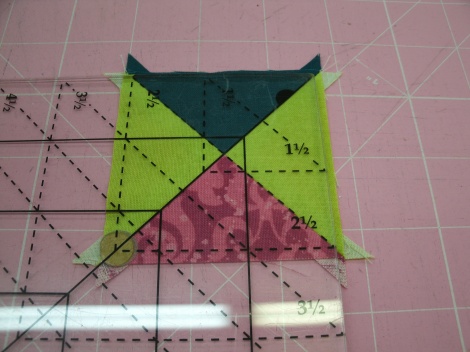
Construction – 1b
Lay the Tucker Trimmer on the QST so the solid diagonal line is on the SW-NE seam, and the dashed 2.5″ diagonal line is on the NW-SE seam. Notice that the lower and left edges of the QST extend beyond the 2.5″ vertical and horizontal lines on the ruler. Trim the right and top edges.
Construction – 1c
Now rotate the QST and line up the Tucker Trimmer again. This time, the two edges you just cut should align with the 2.5″ vertical and horizontal lines, and the diagonal lines on the ruler should line up with your seams. Trim the right and top edges. Make four of these units.
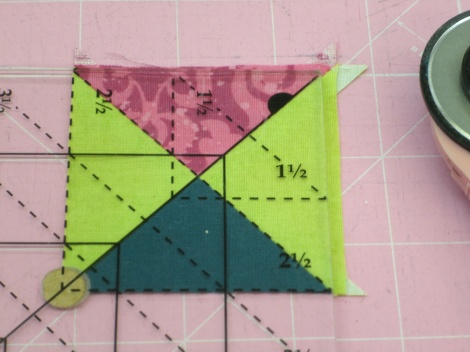
Construction – 2
Step 2: Lay out the star point units with the 2.5″ teal and light blue squares as shown above, and sew together to make your 6.5″ Variable Star block.
Construction – 3a
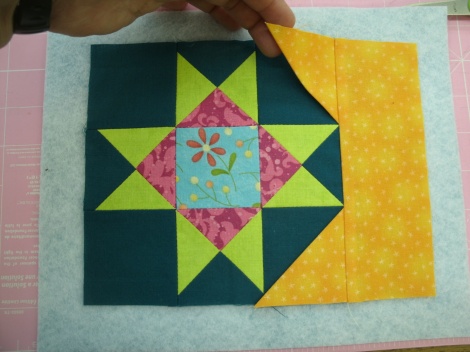
Step 3: We make the curved corners on the star block with a technique called Dimensional Curved Piecing, which I learned from patterns by Annette Ornelas of Southwind Designs.
Fold the four orange squares in half diagonally and press. Lay one triangle on the NE corner of the star block and another on the SE corner, aligning the raw edges. Sew the 2.5″ x 6.5″ orange strip to the right edge of the star block, catching the right edges of the folded squares in the seam. Press the seam toward the orange strip.
Construction – 4a
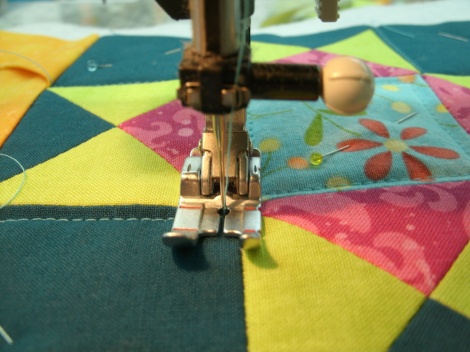
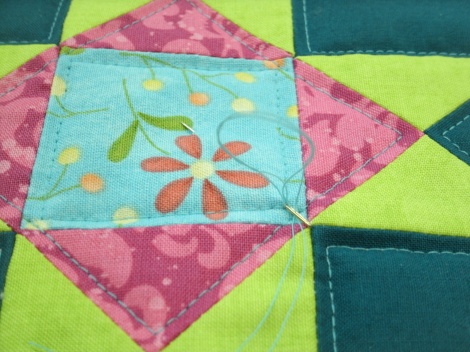
Step 4: At this point, I pinned the piece to the backing and quilted it. Because this is such a small piece, I used the inside edge of the “toe” of my 1/4″ foot as a stitching guide, running it just along the seam lines. I quilted around the green star points, inside the center square and inside the pink diamond.
If you look at the upper-left corner of the photo, you’ll notice that I folded the loose orange triangles back onto the orange strip to keep them out of my way while I quilted.
Construction – 4b
When I do straight-line stitching like this, there will be times I can’t carry the line off the edge of the piece. When I have to start and/or stop “in the field”, I leave myself 3-4″ of thread, which I thread into an embroidery needle (the larger eye is easier on my eyes) and bury inside the quilt. No knots, no back-stitching, just a nice, clean finish.
Construction – 5
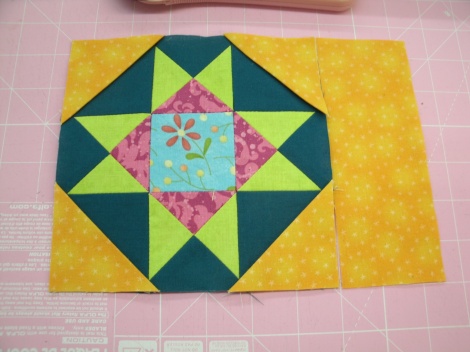
Step 5: I hope I don’t confuse you here. I missed photographing this step, so imagine that in this photo, the piece is quilted. You now trim the backing and batting to match the outside edges of your piece. Fold the NE and SE triangles back over the block corners and pin in place, then pin the last two folded orange squares to the NW and SW corners of the star block.

Construction – 6
Step 6: Press your 2.25″ x 42″ orange strip in half lengthwise, and sew this binding strip to the front side of your piece, to secure all of the raw edges of the orange triangles.
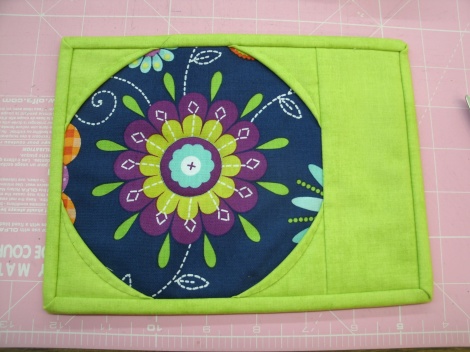
Because the diagonal fold of the orange triangles is on the bias, you can fold this edge back to form a gentle curve. Carefully hand-stitch this edge. You can do it by machine, but personally, I think it’s actually easier and looks nicer sewn by hand.
Now you can finish the back-side of the binding to complete your mug rug.
This quick project took me approximately four hours to complete.
You can use any 6″ (finished size) quilt block to make these mats…
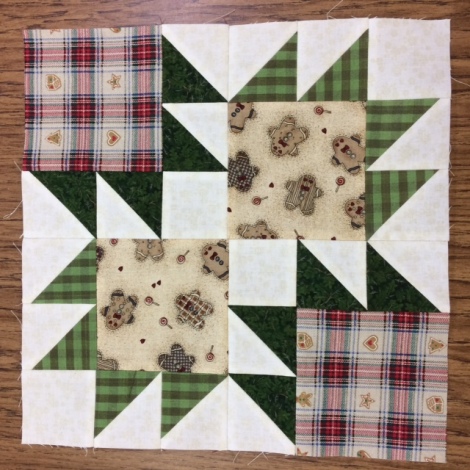
Mug Rug 2 – 2014 by Anne Wiens
or substitute a 6.5″ fussy-cut of a favorite print!

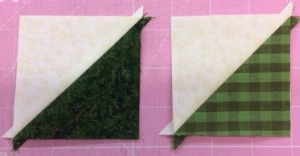 Step 1: Cut all of the 3.5″ squares in half diagonally, and sew the medium triangles to the light triangles. you will have a total of eight half-square triangles (HSTs) in light and light-medium, and eight in light and dark-medium.
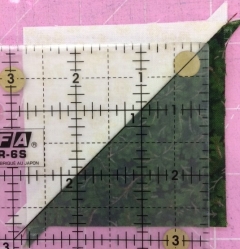 Step 2a: Trim the HSTs to 2.5″ squares. Use a square ruler. Lay the diagonal line on the ruler on the diagonal seam. Notice the HST extends beyond the 2.5″ lines on the ruler. Trim the right and top edges.
 Step 2b: Rotate the HST and lay the ruler on the diagonal line again. This time the edges you just cut should line up with the 2.5″ lines on the ruler. Trim the right and top edges again.
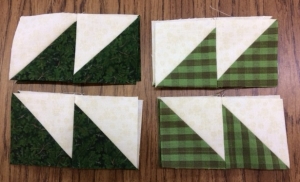 Step 3: Sew the HSTs into pairs. Make two pairs of each color that “point” to the left, and two pairs of each color that “point” right.
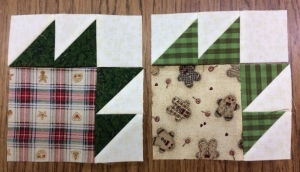 Step 4: Sew a 2.5″ light square to the right end of each of the “point left” HST pairs. Sew the “point right” HST pairs to the right side of the 4.5″ novelty print squares. Sew the HST strips to the novelty print squares to make four “paws”.