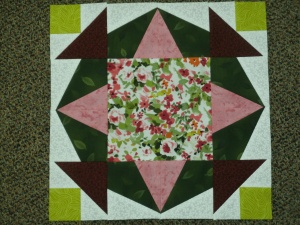
We’re Up to Volume 11, and my contribution to this collection is “Telstar”.
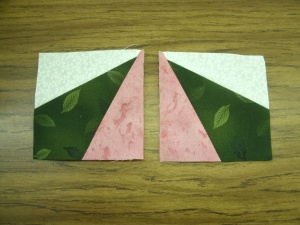
In 100 Blocks the editors gave you templates for paper-piecing this block. I pieced mine, using two of my favorite rotary cutting tools – the Tucker Trimmer® and Center Beam® tools from Studio 180 Design.
If I had named the block before I made it, I probably would have used a space-themed fabric in the center square. The truth is, I have an awful time coming up with titles for my designs. It just happened that I was reading an article about the early days of the US-USSR space race the day before I absolutely had to get this block in the mail. There was a photo of the Soviets’ Sputnik satellite and the American satellite Telstar. Honestly, the block looks more like Sputnik, but I liked the Telstar name, so it stuck.
So, off Telstar went to Quiltmaker, and I began playing with projects built around the block. I did make a cute little quilt with an astronaut print, which I will save for another blog post next week.
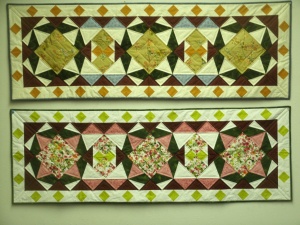
For now, here are a couple of tablerunners made with the Telstar block:
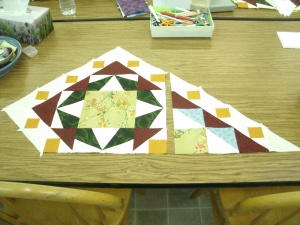
Both tablerunners have 3 Telstar blocks set on point, with pieced triangle units.
I made a little change in the block in the “pink” tablerunner. More about that later.
The tablerunners measure about 18″ x 52″.
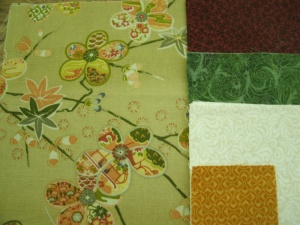
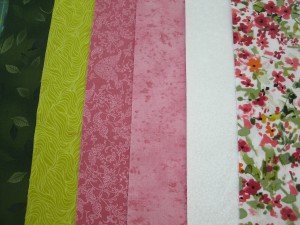
1/4 yard Floral Print
1/2 yard red
1/2 yard green
1/8 yard light blue (not shown)
1-1/8 yards dark blue (Not shown)
1 yard white
1/4 yard gold
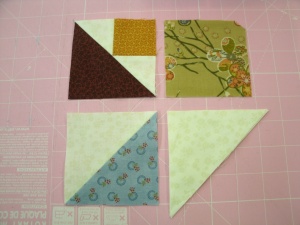
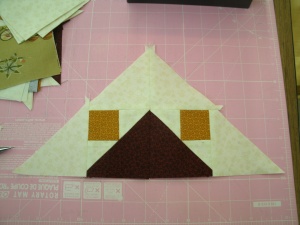
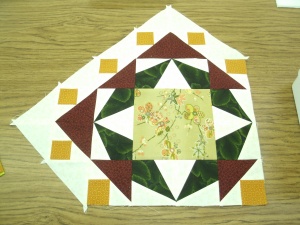
You will need to make three Telstar blocks, according to the instructions in the magazine. For the setting triangles you will also need to make twenty of the corner (red & gold) units, and eight 3.5″ blue/white half-square triangles. Cut eight 5.5″ white squares, and cut each diagonally twice for 32 quarter-square triangles. You also need four 3.5″ squares of your main print. You may notice my green squares are missing one corner. I was determined to use this print in my tablerunner and I was down to my very last bits of it. I was not at all sure I was going to make it!
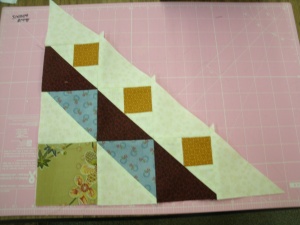
Make 4 setting triangles.
Sew white triangles to the remaining red and gold units and sew into 4 pairs.
Sew corner units to two of the Telstar blocks…
Sew a setting triangle to the right side of each of the end units.
Sew the other two setting triangles to opposite sides of the remaining Telstar block. Lay the center and end units out as shown and sew together to complete your Telstar top.
Use the dark blue fabric for backing and binding. Cut five 2.25″ (2.5″ if you prefer) x Width of Fabric strips, sew end-to-end and press in half lengthwise for your binding. Set aside. Cut the remaining 3/4 yard piece in half along the center fold and sew the two halves together end-to end. Your backing piece should measure approx 21″ x 56″.
Layer the top, batting and backing, quilt as desired and bind.
——————
Because I wasn’t certain I had enough of the green main print to make my first tablerunner, I bought fabric for a second. When I was sure I was “safe” with the first one, I tweaked the pattern a little for the second one.
In the second tablerunner, I substituted a medium pink for the light blue HSTs, and used the green from the “point” units in the block for the binding and backing as well.
I also put a light pink in place of some of the white pieces in the point units. In half the pink was on the left side of the green and in half it was on the right side.
It’s amazing what a difference the one little change makes in the finished block!
————
Thank you for visiting “Seams Like a Plan”.
“Like” my Facebook Page or click the “Follow” button above to be notified whenever a new post appears here.
———–
Giveaway time!
Leave a comment below to be entered in a drawing for a free copy of Quiltmaker 100 Blocks, Vol 11. It’s a random drawing, so gushing flattery won’t get you extra points…but it will make me smile.






Your block makes a wonderful table runner.
LikeLike
Your block turned into a different looking runner than I expected. Always nice to have such a pretty surprise.
LikeLike
What a fun block! In the original…the green really makes it SPARKLE!
LikeLike
Nice block – and thanks for the instructions on using it to make a table runner!
LikeLike
Love the tutorial. It’s always nice to see how a block goes together before you try it yourself.
LikeLike
Thanks for the giveaway.
merryorganic@gmail.com
LikeLike
Great variations
LikeLike
Love your tablerunner! The 100 Blocks issues are always so full of creative blocks. Happy Quilting!
LikeLike
Interesting way to name a block. Wouldn’t have thought of that. Thanks for giving me another idea.
LikeLike
This is a beautiful block. I love it and the colors compliment each other so well. Thanks for the chance to win.
LikeLike
Thanks for the helpful tutorial! Love your block!
LikeLike
Interesting different block, and I like it!
LikeLike
Awesome block! And thanks for the table runner pattern
LikeLike
Love it when all you great designers show your thought process in design thks
LikeLike
I love ‘pointy’ blocks and yours is stellar. 🙂
LikeLike
Thanks for the original setting idea. Very nice!
LikeLike
I’ll gush…Great Block! I really like both versions of the block and already have fabric in mind…thanks also for the tutorial.
LikeLike
Joy- When you finish your tablerunner, please send a photo. I love seeing what others do with my patterns!
LikeLike
love the pink table runner. I am always looking for table runner ideas. Thanks for sharing.
LikeLike
I just love stars! And I really like hearing the inspiration behind your block.
reillyr2(at)hotmail(dot)com
LikeLike
Great post and love your block! thank you!
LikeLike
Cool block. Very original
LikeLike
Gushing flattery heheheee that made me laugh and your block makes me grin, the offer makes me smile 🙂
LikeLike
Love the block. Congrats on being chosen again for the magazine. I love the colors you chose, and the name is wonderful.
LikeLike
I love your block! it’s really versatile! You could even do a small embroidery in the center square! Must have this one!
LikeLike
Love seeing the block on point in the table runner!
LikeLike
Like the pink one lots!
thanks for the tut, too
LikeLike
I have a number of Deb Tucker rulers, too. I get better results when is trim down my blocks, no matter how careful I am when piecing with triangles. Great tutorial. It’s always fun to see the blocks in action.
LikeLike
Very unique block–nice tutorial also!
LikeLike
I’m always on the lookout for table runner patterns and yours are winners. It’s a must make.
LikeLike
I like the suggestions you have made for using your block.
LikeLike
Thanks for the opportunity to win ! Congratulations on your block!
LikeLike
I love the pieced setting triangles you used.
LikeLike
Love the block name — Telstar. That square in the middle is perfect for some fussy cutting or to highlight a great print.
LikeLike
Another great block. I am a fan of Deb Tucker’s quilting tools, also.
LikeLike
Telstar is also the name of a song, which is now playing in my head! Such a nice block.
LikeLike
I too have that song in my head, as soon as I read the name! Now it’s telling how old we are! Lol
LikeLike
Ok, I’m gushing anyway. I dearly love your block, and your table runners are marvelous. I will bookmark this so I can make one, too.
LikeLike
Wonderful block and fabulous name!
mabay1981@gmail.com
LikeLike
Love having the tutorial to follow along. kthurn@bektel.com
LikeLike
I love making tablerunners. Thanks for the tutorial.
auntie.clark@gmail.com
LikeLike
Thank you for sharing with us!
LikeLike
Great block – so versatile!
LikeLike
Thanks for the nice block and good tutorial!!
LikeLike
Gushy flattery is nice though, especially when it comes to our Quilts.thank you!
LikeLike
Great tutorial…thanks so much for sharing!
LikeLike
Congrats on your selection. It’s a great block and your tutorial is great. kathleendotlutzatcomcastdotnet
LikeLike
Hope I’m still in time for the giveaway! Nice tutorial!
LikeLike
Very cute block. Thanks.
LikeLike
What a neat block! It will be very versatile in block arrangements, I think!
LikeLike
Gorgeous block, definitely a must try!!!, I’m your new follower on fb 😉
LikeLike